Here we are, at the third and last part of this guide. In this post, I’ll try to cover what programs you can use for most of your tasks, but also give you an introduction to the terminal.
Please keep in mind that we didn’t install Ubuntu to replace Windows : we are working in a virtual environment, meaning we can’t expected to play games (we even disabled 3D acceleration…). Focus will be done on development : web browsing, coding, files and pictures editing, etc.
Applications
Applications on Linux systems are similar to Windows or OSX applications. But not all of them exists on Linux. I’ll split this section into themes, and show you alternatives to what you were used to.
Also, installing applications is very
easy. Just start the Ubuntu software applications (from the left menu, or by using the global search), search for what you want, and click Install. You can also browse by categories if you don’t know the name
of your application. Lastly, if you can’t find something, Google is still a valid option to find what you are looking for. Some applications are not available through the repositories, and are instead distributed as .deb files
(Debian packages).
Web browsing
Unless you are coming from OSX (but in that case, you should probably stick to it, it may be the best operating system for developers… if you are willing to pay the price), you shouldn’t have problems to find what you want.
- Firefox : Firefox is the default web browser in Ubuntu. It’s very fast, powerful, you can install plugins to use even more features, and its debugging tools are very powerful.
- Chromium : Chrome itself is not available on Ubuntu, but Chromium is. To quote their website :
The Chromium projects include Chromium and Chromium OS, the open-source projects behind the Google Chrome browser and Google Chrome OS.
If you were using any of these two on Windows, you can just sign in to keep your bookmarks and plugins synchronized. If you were using Internet Explorer before… you should really try any of these two alternatives. They are just better in every single aspects. Even on Windows.
Text Editor
The basic text editor on Ubuntu is called Gedit. It’s similar to Notepad++, and support plugins to add more features. If you want something more advanced, I’ll give you some alternatives (that I’m using)
in the Coding section.

If you want to show the world how awesome you are at using very complex tools, I suggest you to try VIM or Emacs. But if, like me, you are not ashamed of using an IDE (Integrated Development Environment), you should find what you are looking for in the next sections.
Picture editor
Well, unfortunately, Photoshop is not available on Ubuntu. Instead, you have GIMP. While not as powerful, GIMP can do lots of things, and also supports plugins to have access to more features. I may do a quick tutorial on
GIMP in the future, but I’m not an expert. You can find some basic and more advanced tutorials here : https://www.gimp.org/tutorials/
Music
If you want to listen to music while coding (or not), you can use the default program called Rhythmbox. I, myself, prefer to use web players, such as Google Music.
If you are a Spotify user, there is a version for Ubuntu (and also a web player on their website). To install it, you’ll need to type some commands in the terminal : https://www.spotify.com/be-nl/download/linux/. Don’t worry if you don’t understand them yet.
Videos
While there is a default applications for videos, I suggest to use VLC, because it supports nearly all existing formats by default (you don’t need codecs).
Code/IDE
If you have done a bit of research, you should know that one of the best IDE for Java is IntelliJ. It can supports a lot of other languages (HTML, CSS and Javascripts
are supported by default, but you’ll also get support for Kotlin, Groovy, Scala, Maven, Ant, Git, SVN, Mercurial, CVS, Typescript, Android development, and much more). It also works on Windows, OSX and Ubuntu. BUT, the Ultimate version
is not cheap.
If you want to install it, you’ll have to go to their website and download the compressed archive : https://www.jetbrains.com/idea/download/#section=linux.
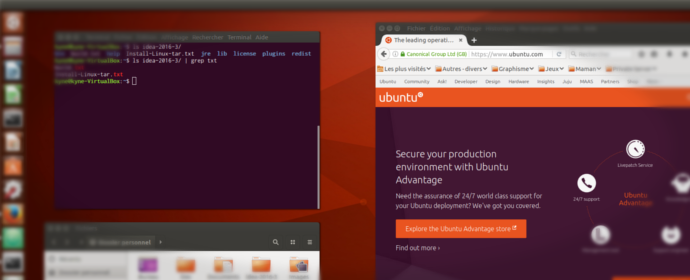
Unpack it somewhere on your computer (you can right click the downloaded file to extract), open a terminal, go to the extracted directory (see last section) and type
A free, and very powerful alternative (that I’m using) is Atom, a text editor developed by the Github team. It comes with a lot of features, supports lots of plugins, themes,
and high customization.

I will probably do a dedicated post to show you some of the best packages you can use. For example,
it can integrate the Hexo commands to generate and serve your blog files (see my first post)
Other applications
| Windows | Ubuntu | Comment |
|---|---|---|
| Outlook | Thunderbird | But you should really consider creating a Gmail address from Google |
| Microsoft Office | Libre Office | This set of applications will maintain as much compatibility as possible, but they definitively lack some features |
| FileZilla, FTP Clients | FileZilla | But the default file explorer can also connects to FTP servers if you type the URL in the adress bar |
| Putty | Terminal | Just type ssh username@host.com |
| WinSCP | File Explorer (Nautilus) | Same as the FTP client |
| Torrent clients | Transmission | Very basic, but it works |
| Skype | Skype | https://www.skype.com/en/download-skype/skype-for-linux/ |
You can find even more alternatives here : http://askubuntu.com/questions/389228/what-default-windows-software-alternatives-does-ubuntu-have
Accessing files from the host (Windows)
Ok, so let’s get back to our virtual machine. As I said, Ubuntu is running inside a “box”. You can’t really access anything outside this box, unless you asks VirtualBox for some help.
To do this, simply open the VirtualBox menu, and open
the Shared Folders configuration
Simply add a new shared folder, browse to the location, and don’t forget to check “automount” and “make permanent”
If you open the file explorer in Ubuntu, you should now see a new entry on the left
Unfortunately,
you probably can’t access it right now, because VirtualBox only allows the root account to access this folder. The easiest solution I found was to open a Terminal, and add yourself in the virtualbox (vboxsf) group, to have full
access to this folder (replace “username” with your ubuntu login)
Reboot the machine, and you should now have access to your windows files.
Terminal
What is it?
“Under Linux there are GUIs (graphical user interfaces), where you can point and click and drag, and hopefully get work done without first reading lots of documentation. The traditional Unix environment is a CLI (command line interface), where you type commands to tell the computer what to do. That is faster and more powerful, but requires finding out what the commands are.”
The terminal can be seen as a more powerful version of Windows “cmd”. More powerful also means more “dangerous”, but don’t worry, you won’t break your environment so easily.
What can I do with it?
Pretty much everything. Using the terminal, you can install applications, update your system, edit and search for files, automate tasks, and much more.
In this last section, I will show you some very basic commands (some of them may be
similar or identical to the Windows ones)
cd
cd can be used to open a directory. Let’s say you want to open your home directory (that’s basically “My documents” from Windows), you can simply type
or use this shortcut
If you want to go “up” a directory, use ... If you want to reference the current directory, use .
pwd
pwd is not related to the password (that’s actually passwd), but instead, it will print the current directory
ls
ls prints the content of a directory. Options -la will print more details.
You can filter the results using pipes. Pipes can be very complex, so I won’t cover that in this post. Basically, pipes sends the result of a command to the next command (if you have worked with Angular) before, it’s basically the same as the Angular pipes. Well, technically, it’s the other way around).
The
pipe we will use here is grep. It can be used to filter texts, even by using regular expression. If you want to list all PNG files inside a folder :
rm
rm will remove a file or directory. Be careful with the “recursive” -R version, as it will remove everything inside the target. The most dangerous option is the combination of “recursive” and “force”
-f. If you run it on the root folder, using the administrator account, you can simply destroy your entire system. So always check twice the command you will run.
sudo
Ubuntu use accounts to login into the system. But there is one account that acts as the administrator. This account is always called root, and can be required to perform some tasks, such as installing applications of updating
the system. To switch to the root account, you can type
This will prompt you for your password. That means users can become administrator using their own password (this can be disabled on servers to increase the security).
If you want to run a command as root, simply prefix it with “sudo”
Update the system
Updating your applications is very easy, and takes only two steps.
The first one will update all repositories, to ensure they are using the last version of all packages.
Then, you can start the upgrade by running
Installing an application
Installing an application only requires you to know its package name.
To search for a package, you can use this command
To remove an application, simply type
Starting an application
Usually, you can start an application from the terminal. For example, if you want to quickly edit a file with Gedit
Or you can open Atom and set your workspace as the current directory
Conclusion
I think we have covered a lot of stuff today. There is still much to cover, but I think you now have enough basic knowledge to continue on your own.
You will find plenty of tutorials and forums around the web to help you use Ubuntu.
In
the next tutorials, we will probably learn more about Atom, and I may also do a quick tutorial on GIMP.