If you are working as a developer, if you have some technical background, or simply if you label yourself as a bit geeky, you are probably aware that Windows is not the only operating system in the world (this is especially true if you are reading this blog on a Mac). Even your smartphone is probably running on Android instead of Windows (Phone).
Arguing about the best of them is pointless. Each one of them has pros and cons, from their price to their “user-friendliness”.
My goal in this post will be to show you Ubuntu, a free and open-source operating system based on Linux, and convince you that it is a very solid alternative to Windows as a development environment, that it’s easy to setup, easy to use, and completely free. And to achieve that, I will show you how to install it without running a single command in terminal, and without any risk of losing your data.
Note that this tutorial will be split into multiple posts. This one is the first part.
What is Ubuntu
Ok, so first, you probably want to learn more about Ubuntu. Why did I choose this operating system (OS)? What does it do?
I’ll start by quoting Wikipedia)
:
Ubuntu is a Debian-based Linux operating system for personal computers, tablets and smartphones where Ubuntu Touch edition is used; and also runs network servers, usually with the Ubuntu Server edition, either on physical or virtual servers (such as on mainframes) and/or with containers, that is with enterprise-class features; runs on the most popular architectures, including server-class ARM-based.
Yes.. that seems very technical, and not useful at all. So let’s split this information.
- Linux is a UNIX-like operating system : it shares a common base with MacOS and other operating systems, but this one is based on a free and open-source model. Also, this is actually a very basic OS on top of which other elements are built.
- Debian is what we will call a Linux distribution. Simply put, it’s a set of programs packaged together to build a fully functional OS. We could install Debian as it is, but we want something a little bit more user friendly and “cool”
- Ubuntu is based on Debian. You could see it as some kind of an “experimental” version of Debian, with more updates and recent features. But fear not, it’s actually quite stable
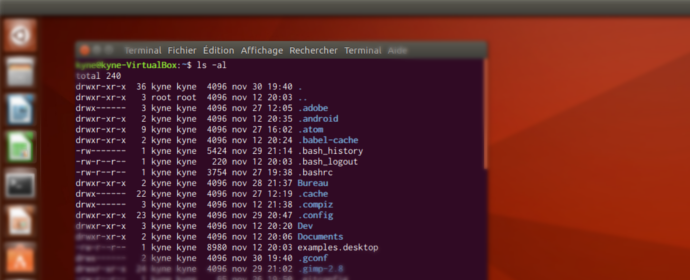
But what does it looks like?

As you can see, this is not an obscure ASCII terminal in black and white, and it’s not the Matrix either.
And why would I need it?
As I said in the introduction, the goal is to install a very powerful development environment. Because let’s face it, while Windows will get the job done, it’s not the most efficient (it could actually be the worst of all) when it comes to pure development (especially coding). If you have read my first post on how to install Hexo, you probably saw that installing something on Mac and Linux (I will say “Linux” when I’m referring to Unix-based operating system that are not MacOS) is most of the time done by running the proper command, while windows requires a dedicated installer that won’t integrate everything as smoothly.
I will always try to add alternatives for Windows users on my next posts, but you should really give Ubuntu a try if you want to invest some time in custom projects at home.
Installation
When installing Ubuntu, you basically have three options
- Installing it on top of windows, losing all your files and programs (if you own an old laptop that you were planning to trash for example, it could be the easiest solution)
- Installing it next to windows, by splitting your hard drive into two partitions (or more)
- Installing it in a virtual environment
In this post, we’ll cover the third option and install VirtualBox to host our virtual OS.
Just go to https://www.virtualbox.org/wiki/Downloads and choose the “Windows hosts” or “OSX (Mac) hosts” (if you are already on another Linux distribution, it’s also possible, but I think you already know all the details).
Install VirtualBox as any other software and start it.
Creating the machine
The first step is to create a new virtual machine. Just click the “New” button in the top left corner.
This will start an assistant to help you setup your virtual machine. Let’s do this together
First, you’ll have to choose a name for your machine. Pick anything you want, but don’t forget to select the proper type and version (Linux and Ubuntu 64)
Keep the default values for the memory, we’ll adjust it later. Click next, and choose to create a new virtual hard disk now. This will create a big file on your disk that contains the whole system.
For every other steps, keep the default values. If you wish, you can use a “fixed sized” disk to create one single big file (I choose this option, but it may be harder to resize the disk later on). We’ll continue tweaking the machine once it’s created. For the disk size, I recommend using at least 10 Gb (But if you can afford the space, use 16 or even 20Gb).
Tweaking the machine
Once the machine is created, select it, and click on “Settings”.
Go to System. For the RAM, I decided to use half my RAM (4Gb/8Gb). You shouldn’t need more than 4Gb anyway.
Go to the next tab, and try to use as many CPUs as available (don’t go into the red part of the slider)
Next tab. Use the same settings as the one from this screenshot.
You can now open the Display section. Move the slider to the right until you reach 128mb.. or lower if your graphic card is old.
Right now, I’ve disabled 3D acceleration because it causes some problem in a virtual environment
(you can’t take screenshots for example).
I also manually changed some configuration
file to use 256Mb. Without 3D acceleration, I don’t think it will matter much, but if you want, simply edit the .vbox file (right click on your virtual machine and select “Show in Explorer”) with any text editor, and change
the following row :
Lastly, I only managed to have proper audio by using Intel HD Audio. You can try other settings if you want.
What’s next ?
I’m sorry, but we have reached the end of this first part. Don’t worry, next part will follow quickly.
You now have a properly setup virtual machine, but it’s still empty. In the next post, we’ll install Ubuntu together, and I will keep
my promise : we won’t use any terminal.
To prepare for this next post, you can start downloading Ubuntu 64 here : https://www.ubuntu.com/download/desktop
Click on Download, and then,
decide if you want to pay or not by adjusting the sliders. Don’t feel ashamed to use it for free.
You won’t need any additional software to use the download .iso file, VirtualBox will take care of it.