DIY Arcade Controller

Do you still have your raspberry somewhere on your desk or near your TV? Great ! Because we can go to the next level and build our own arcade controller with an embedded console.
How? By putting the raspberry itself inside our arcade stick !

Read More

Share Comments

Exporting a VirtualBox image to VMWare

In the first posts, I showed you how to install Ubuntu in VirtualBox. I did choose VirtualBox because the installation didn’t seem to work in VmWare Player (Another well know product for creating and running operating systems and applications in a virtual machine). Unfortunately, I also encountered some bugs in VirtualBox whenever I tried to enable 3D acceleration (screenshots were black, and Atom was not starting properly).

So after some search, I found out it’s actually quite easy to migrate a working image from VirtualBox to VMWare Player.

Read More

Share Comments

A cheap retro-gaming solution : the Raspberry PI (Part 2)

Welcome back to this second part of the retro-gaming tutorial. Now that we have a working Raspberry, let’s install RecalBox. Recalbox (or RecalBoxOS should I say) is a free, open source operating system designed to work on Raspberry machines (and equivalent). Basically, it’s a bundle of emulators to play almost any old games, with a very user friendly interface on top of it, designed to be used on a TV.

Read More

Share Comments

A cheap retro-gaming solution : the Raspberry PI (Part 1)

You may already know that Nintendo recently released the Nintendo Classic Mini, a smaller re-edition of the original NES, but with a limited set of pre-installed games.

The Nintendo Classic Mini: Nintendo Entertainment System is a miniaturised version of the groundbreaking NES, originally released in Europe in 1986.
Just plug the Nintendo Classic Mini: Nintendo Entertainment System into your TV, pick up that grey controller, and rediscover the joy of NES games – in high definition at 60 Hz!

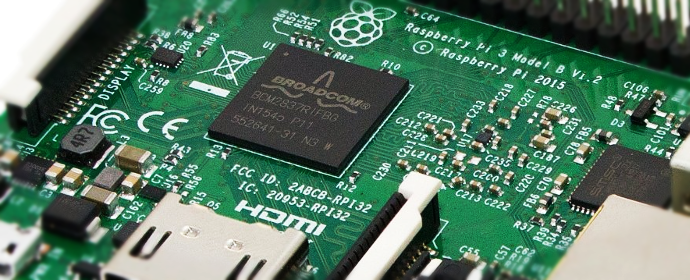
Now, what if I told you that there are other reliable, (cheaper?), easy to setup, alternatives? Yes, that’s right, and it’s called the Raspberry Pi. But instead of letting you play some 
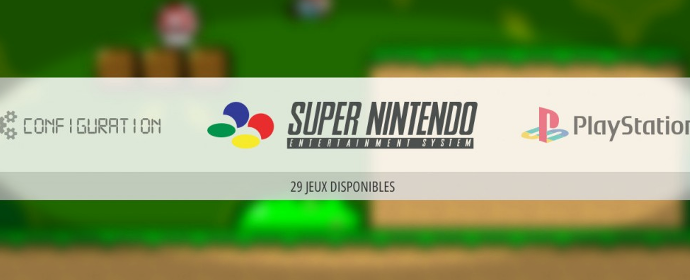
NES games, this will actually allow you to play any NES, Super NES, Gameboy, GBA, NeoGeo, .. and even Playstation games. And this will only cost you around 70$ (unfortunately, it will also cost 70€ if you are from Europe like me, so it’s a bit more expensive).
You will even be able to use the Raspberry Pi as a media center, if you are tired of playing games.

As you have probably seen, this tutorial will also be split into multiple parts. The first one will teach you a bit more about the raspberry and how you can set it up. The second part will teach you how to install the proper softwares to dive into the retro-gaming madness.

Read More

Share Comments

Creating a material design wallpaper for your smartphone with GIMP

Material Design is a set of rules defined by Google to build a graphical interface. It was first introduce in June 25, 2014, at the Google I/O conference, and is used since Android 5.0.

The goal of Material Design was to build a unified interface and experience across platforms and device sizes. It was built upon a list of principles that I won’t detail here (because that’s not the point of this post), but I can a least give you a summary :

  • Material is the metaphor : each element exists in space, and follow the rules of physics. The background of your application is one giant big sheet of paper, with components lying on top of each other that can rearranged.
  • Bold, graphic, intentional : typography, grids, space, scale and colors create a hierarchy of elements with meaning, and focus
  • Motion provides meaning : motions must be used to focus attention on elements, without breaking the continuity. Transitions are efficient, coherent, and feedback is subtle, yet clear.

Using these guidelines, Material Design applications tend to be somehow minimalistic. This is a good opportunity for us to build a wallpaper, as we won’t need much knowledge of the advanced features of Gimp.

So let’s dive right into it !

Read More

Share Comments

Recommended packages for Atom

If you have read my previous article, you may have chosen to give Atom a try.
The best way to describe what Atom is, is to quote its website ( https://atom.io/):

Atom is a text editor that’s modern, approachable, yet hackable to the core—a tool you can customize to do anything but also use productively without ever touching a config file.

Atom works. It’s simple, yet very powerful. It relies on community plugins to extend its base features. Ah, and it’s available on Windows, Mac and Linux (meaning you don’t have to follow all three previous tutorials on Ubuntu to test it).

In this article, I’ll show you some of the best plugins (called packages) that you definitively should check out.

Read More

Share Comments

Discovering and installing Ubuntu in VirtualBox P3

Here we are, at the third and last part of this guide. In this post, I’ll try to cover what programs you can use for most of your tasks, but also give you an introduction to the terminal.

Please keep in mind that we didn’t install Ubuntu to replace Windows : we are working in a virtual environment, meaning we can’t expected to play games (we even disabled 3D acceleration…). Focus will be done on development : web browsing, coding, files and pictures editing, etc.

Let’s dive right into it !

Read More

Share Comments

Discovering and installing Ubuntu in VirtualBox (Part 2)

Welcome back to the second part of this tutorial. We’ll continue right were we left. In this second part, we’ll install Ubuntu and do some last tweaks to our installation.
At the end of this post, you should have a working virtual operating system.

Note : I’ll do a third (and final) part to help your learn and configure Ubuntu.

Let’s get going !

Read More

Share Comments

Discovering and installing Ubuntu in VirtualBox (Part 1)

If you are working as a developer, if you have some technical background, or simply if you label yourself as a bit geeky, you are probably aware that Windows is not the only operating system in the world (this is especially true if you are reading this blog on a Mac). Even your smartphone is probably running on Android instead of Windows (Phone).

Arguing about the best of them is pointless. Each one of them has pros and cons, from their price to their “user-friendliness”.

My goal in this post will be to show you Ubuntu, a free and open-source operating system based on Linux, and convince you that it is a very solid alternative to Windows as a development environment, that it’s easy to setup, easy to use, and completely free. And to achieve that, I will show you how to install it without running a single command in terminal, and without any risk of losing your data.

Note that this tutorial will be split into multiple posts. This one is the first part.

Read More

Share Comments

Hello World, and building your own blog

Hi ! I’m Aurélien, but you’ll find me around on the web as Kyne, or KyneSilverhide. I’m a developer from Belgium (yes, we have beer and chocolate).

I’ve recently learned about Hexo, a very powerful tool to build “static blogs”, using Markdown and some command lines. As most developers should know, the best way to test or learn something is by using it in a real project. That’s why I’ve decided to start this blog mostly about programming stuff, and technologies.

In this very first post, I’ll show you how to install Hexo for you own blog, and host it on Github (for free, of course).
Also, English is not my main language, so I hope everything will be as smooth as possible.

Read More

Share Comments